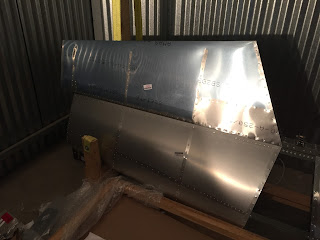
1.5 hrs - this post is about completing the ends of the elevator- not about hints (tips) for building the elevator! The directions are fairly simple and clear for this step. Wrap the tip rib (with attached counterweight) with the forward elevator tip skin. Cleco and rivet. Then insert the fiberglass composite tip, position inside the aluminum skin, then drill and cleco the tip in place. Once it's fitted then clean up the holes as needed, insert the rivets and complete the assembly (pull the rivets). The fit was pretty good, looks like the trailing edge of each tip will need to be faired/filled to match the profile of the elevator aluminum skin better.
Labels
- Elevator (6)
- Empennage (21)
- Flying (3)
- Horz. Stabilizer (3)
- Links (1)
- Misc (2)
- Rudder (3)
- Vert. Stabilizer (5)
Monday, November 28, 2016
Saturday, November 26, 2016
Elevator Skin (Left side)
2.5 hrs. - Today Liam and I worked on the left elevator Skin, which is more complex than the right. Made sure we inserted all of the doublers for the rear channel that supports the trim tab. Everything fit together pretty well. The last items to do on the elevator is the outer forward skin and the composite tips.
Friday, November 25, 2016
Elevator Skin (right side)
2 hrs. - Removed the right skin fm the shipping crate, pealed off the inside film and cut away the rivet hole lines...and primed the inside. Carefully attached the skin to the right elevator structure and only had to open up a few holes on the top of the #1 ri to avoid the trailing edge deformation as shown in the plans. Once both sides were clecoed - I began riveting!
After finishing both sides - I then clecoed and riveted the leading edge where it wraps over the top and bottom skin. I had contemplated dimpling this rivet line and using CCC-42 (flush rivets)...but decided to just do as the plans call for. Once finished I trail fit the elevator to the horizontal Stabilizer...and it fits!
After finishing both sides - I then clecoed and riveted the leading edge where it wraps over the top and bottom skin. I had contemplated dimpling this rivet line and using CCC-42 (flush rivets)...but decided to just do as the plans call for. Once finished I trail fit the elevator to the horizontal Stabilizer...and it fits!
Thursday, November 24, 2016
Happy Thanksgiving! Elevator assembly continues...
2 hrs. Continued installing and riveting the ribs #2 and #3. Unfortunately I mixed up the location of the Left and Right sides since I was building this upside down (to allow for the elevator control horn to face up). Had to drill out about 12 of the larger alum. rivets...move the ribs to the opposite side, and re-rivet.
Moving on to the outer Ribs, now it gets a little more fun. Had to cleco and then updrill the counterweight to allow for the extra large 4.8mm rivet to fit. These are rivets on and I'm going to only do one side at a time for the outer rib, and skin since my work table is only 6' long. I'm finding the counterweight is torquing the last rib and entire elevator structure if it's not supported.
Moving on to the outer Ribs, now it gets a little more fun. Had to cleco and then updrill the counterweight to allow for the extra large 4.8mm rivet to fit. These are rivets on and I'm going to only do one side at a time for the outer rib, and skin since my work table is only 6' long. I'm finding the counterweight is torquing the last rib and entire elevator structure if it's not supported.
Friday, November 18, 2016
Elevator parts prep and begin riveting spar
3 hrs. - I've consolidated a few separate sessions into this post. Began by prepping the elevator spar, ribs, attach angles, doubler channels, etc. by removing the plastic film, and deburring edges and holes as needed. Primed all of the parts with self etching primer.
After the primer set it was onto following the steps in the book for item #1 and #2.
And a detailed picture of the elevator control horn and center hinge bracket with the inner ribs (rib 1 - left and right) now attached with rivets and the AN-bolts/nuts.
After the primer set it was onto following the steps in the book for item #1 and #2.
And a detailed picture of the elevator control horn and center hinge bracket with the inner ribs (rib 1 - left and right) now attached with rivets and the AN-bolts/nuts.
Sunday, November 13, 2016
Elevator Trim Tab
1 hr. - Assembled the elevator trim tab per the plans. The instructions are a bit confusing as they indicate the need to modify the rivets (for the whole assembly?) due to them being too long. We only found the first to rivets on the control horn tab needed shortening. All of the others were fine.
Subscribe to:
Posts (Atom)


