
Sunday, October 30, 2016
Horizontal Stabilizer complete
1.5 hrs. This week I was able to rivet half of the top side, and today my son and I completed the remaining rivets. For some reason I had extra 4x10mm rivets and ran out of the 3.2x8mm. Hopefully there is enough in the empennage kit to balance this out.
 My thoughts so far on the Sling 4 kit compared to the Sonex. No fabrication! No pilot hole drilling, and upsize drilling, a lot less debuting, and very little hole reaming is required. The kit so far is going together well. I'm sure if the kit were home in my garage workshop where I built the Sonex the empennage would be done by now. But building at my hangar is slow, and mostly limited to weekends.

Saturday, October 22, 2016
Riveting skins on the horizontal stabilizer
3.5 hrs. - Today was the first time I've worked on the Sling in a few weeks, been busy with work and Boy Scouts.
Completed riveting the forward ribs and spar together. My son Liam helped again today and used the rivet gun to pull the rivets for me while I reamed holes and inserted the rivets for him.

 To prep the skins I removed the plastic film on the inside and deburred the punched holes with 320 grit sand paper (quick and easy way to do this). Cleaned the surface and sprayed the mating surfaces with etching primer.

Next was clecoing on the left and right skins, and checking the tips for level (to each other).
 My measurements were good so no warp is built in to the Horizontal Stabilizer.
 Riveted the left skin on...
 And the right skin...need to flip the HZ over and rivet the top another day.

Completed riveting the forward ribs and spar together. My son Liam helped again today and used the rivet gun to pull the rivets for me while I reamed holes and inserted the rivets for him.


Next was clecoing on the left and right skins, and checking the tips for level (to each other).


Tuesday, October 11, 2016
Horizontal Stabilizer - front spar & ribs
1.5 hrs. Prepped and primed the parts for the front spar, doubler plates, and nose ribs. Components are clecoed together ready for riveting.


Monday, October 3, 2016
Horizontal Stabilzer - rear spar & ribs
2 hrs. - Completed priming, and installed some carpet tiles on my workbench.
Was able to reassemble the 1st page of the horizontal stabilizer plans/parts with clecos. It's now ready to rivet together.
 Riveted and completed:

Was able to reassemble the 1st page of the horizontal stabilizer plans/parts with clecos. It's now ready to rivet together.


Saturday, October 1, 2016
Empennage progress - Horizontal Stabilizer
3 hrs. completing the inventory for the empennage kit, my son and I jumped right into the first page of the build manual:

Gathering up the parts, we temporarily fastened them together with the appropriate sized clecos (black and copper (5/32" and 1/8"). It went together quickly and was impressed with the "match hole" tooling and parts forming.

 I took all of the pieces apart, and made sure the edges and holes were properly deburred...this is important for eliminating future stress cracks/fracutures. I'm following The Airplane Factory recommendation for priming the mating surfaces. Used a process of cleaning with Simple Green and scotchbrite pad, then dry, and spray with a self etching primer.


Gathering up the parts, we temporarily fastened them together with the appropriate sized clecos (black and copper (5/32" and 1/8"). It went together quickly and was impressed with the "match hole" tooling and parts forming.

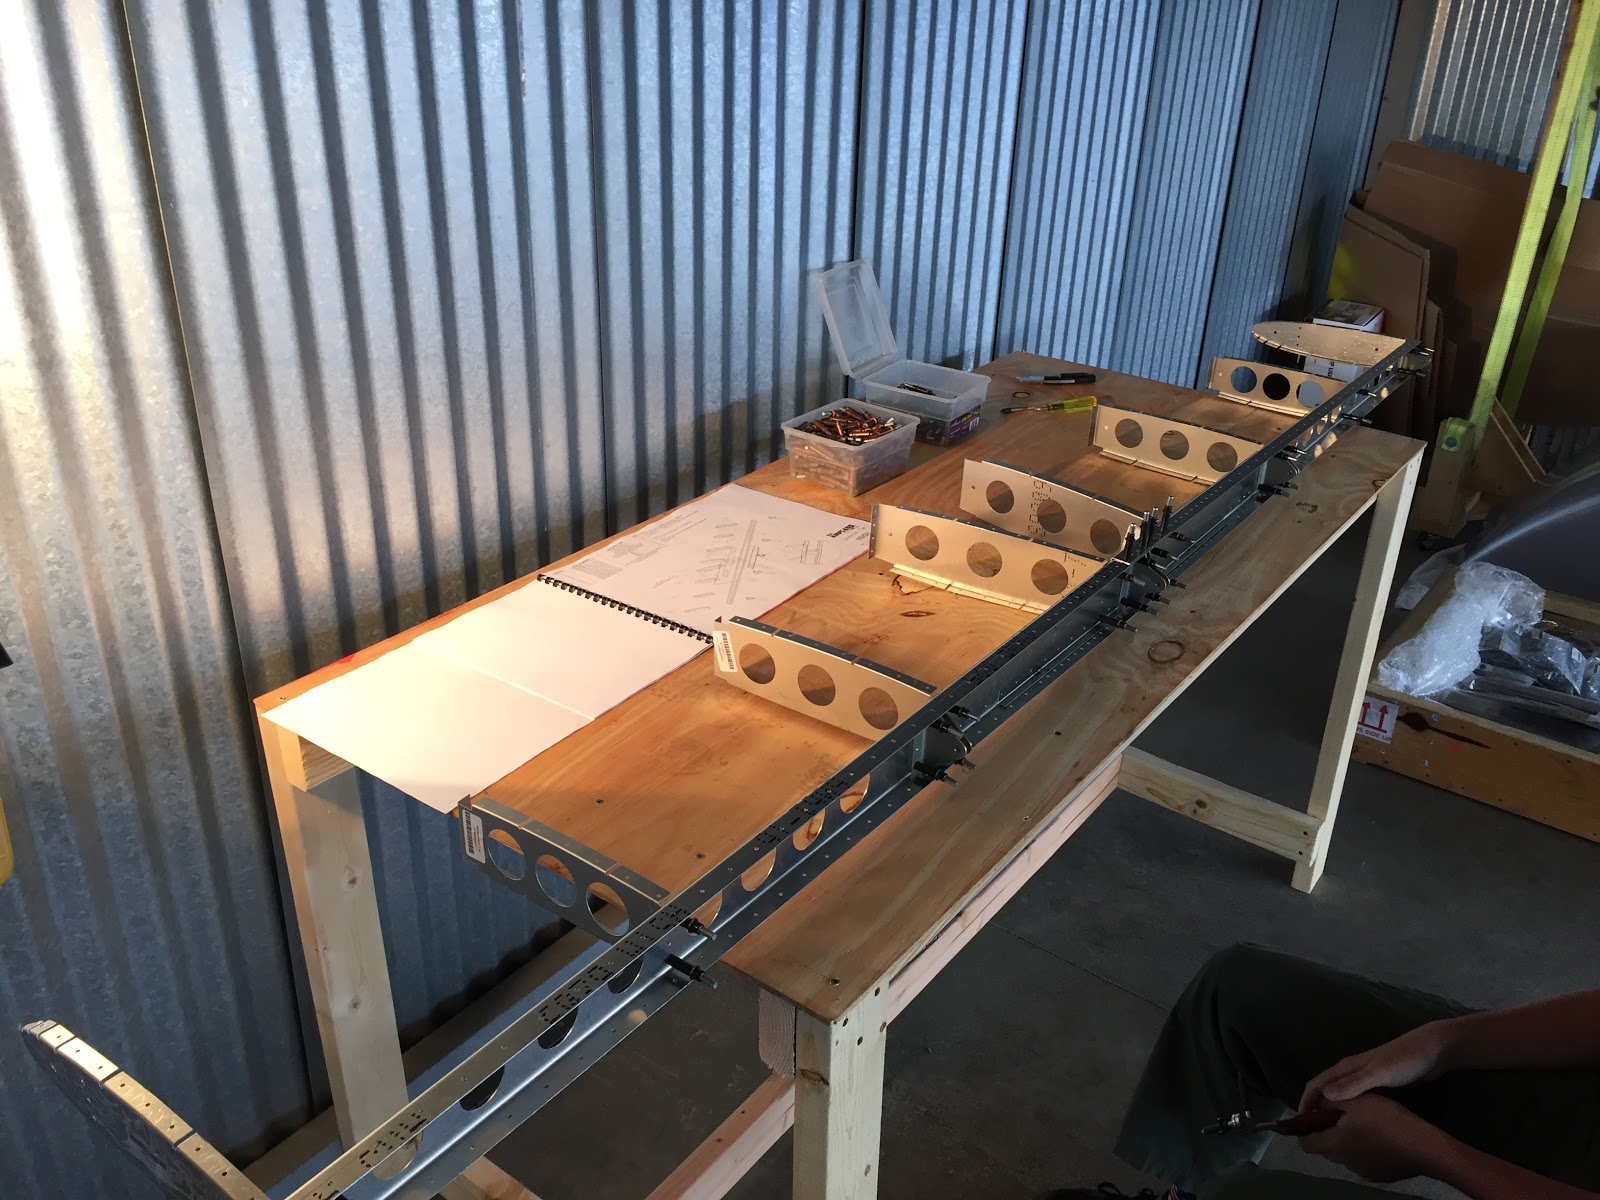

Work bench for empennage
1.5 hrs. - Today I constructed the work bench to assemble the empennage. Similar to when I constructed the Sonex several years ago, I recycled part of the shipping container. This gives me a work surface roughly 0.7M x 2M (2.7' x 6').


Friday, September 30, 2016
What is a Sling 4?
About the project. After completing my first experimental amateur built (E-AB) aircraft, which is a Sonex 2-place aluminum low wing light sport, my wife mentioned it was too bad the plane wasn't big enough for the family to all fly in. We discussed selling the Sonex and getting a used certified airplane (i.e. a Cessna or similar). Stepping back from a new airplane I can work on to a 40-50 year old plane only a certified aircraft mechanic can touch...wasn't that interesting to me.
After researching the various 4-place "kit" aircraft currently offered, I narrowed my search down to then Van's RV-10, a Cozy MkIV, and a newer entry to the market - The Airplane Factory's "Sling 4".
This airplane has flown around the world twice since it's inception in 2011, and is developed in South Africa. They have a US distributor based in Torrance, California, who are affiliated with MGL Avionics (I have their EFIS and COM radio in my Sonex). See the company website for more details: The Airplane Factory

After researching the various 4-place "kit" aircraft currently offered, I narrowed my search down to then Van's RV-10, a Cozy MkIV, and a newer entry to the market - The Airplane Factory's "Sling 4".
This airplane has flown around the world twice since it's inception in 2011, and is developed in South Africa. They have a US distributor based in Torrance, California, who are affiliated with MGL Avionics (I have their EFIS and COM radio in my Sonex). See the company website for more details: The Airplane Factory

I found this to be a very interesting airplane and project. Modern, efficient, attractive, roomy, great range and load capacity. Turbo Rotax 914 UL, giving 120 knots, at less than 6 gph. 1000 mile range and service ceiling of 15,000'.
Stay tuned and follow my built blog as we build our dream project...
Subscribe to:
Posts (Atom)