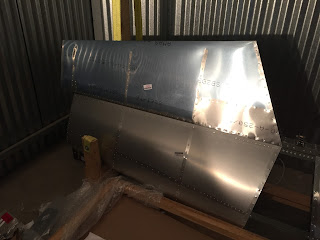
1 hr. - Flipped the VS over and inserted all of the rivets, and began finishing up the skin.
And it's done!
Installed both antenna rods to see how it looks:
Labels
- Elevator (6)
- Empennage (21)
- Flying (3)
- Horz. Stabilizer (3)
- Links (1)
- Misc (2)
- Rudder (3)
- Vert. Stabilizer (5)
Showing posts with label Empennage. Show all posts
Showing posts with label Empennage. Show all posts
Wednesday, April 12, 2017
Monday, April 10, 2017
Vertical Stabilizer Skin
3 hrs. - It's been almost a month since my last post. Life's kept us busy! Had some down time with the Sonex engine I wanted to solve, and working away on my wife's office. Good news is the Sonex is airworthy again and back in the sky. I'll post about that soon.
Had to complete the VOR/GS/LOC antenna cable end before closing up the Skin. When I ordered the antenna and cable, I also purchased the wrong fitting. I needed Male ends but got female. Thought I had an extra one at my hangar...and I did...an extra Female end. Another order from Aircraft Spruce, and now the cable is terminated and connected to the antenna puck.
Skin is fitted and then I could enlarge the openings for the antenna rod exit holes.
If you look closely at the top, you can see the VOR/GS/LOC antenna rod sticking out. These thread into the puck thru the Skin, and have a Allen set screw that locks it in place.
I reamed out all of the rivet holes, deburred the skin and structure and primed the inside Skin. It's not pretty but also not meant to be visible, just cut down on corrosion.
Sunday, March 12, 2017
Rudder Fiberglass Tip
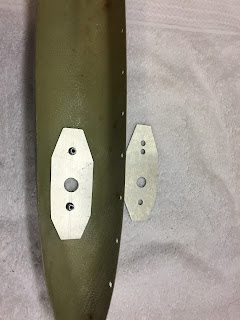
1.5 hrs - After consulting with Craig M on the type of strobe he's using, I went ahead and made a new backing plate. This gets connected to the fiberglass tip with two rivnuts. The plate that TAF sends has multiple holes punched, none of which align with the 1.75" distance for the mounting holes on the AveoFlash posistrobe XP unit.
Next was to rivet the tip on with the filler panel (aluminum). Don't forget to run the pull wire!
Next was to rivet the tip on with the filler panel (aluminum). Don't forget to run the pull wire!
Rudder Skin (from Feb. 16, 2017)
2 hrs. - Forgot to post this last month...completed rivetinfmthe son of the rudder to the structure. Began fitting the fiberglass tip, but quit when I looked at the strobe backer plate...need to research the make of strobe I plane to use.
Sunday, February 12, 2017
Vertical Stabilizer Structure Complete
2 hrs. - It's been over a month since any work was done on the Sling 4. We've had a major diversion with the remodeling and tenant finish of my wife's new office fo her medical practice. That project has made some great progress...so this afternoon while "relaxing" I decided to step out to the garage and complete the vertical stabilizer structure. I had previously finished the rivnuts and the forward spar and ribs. Completed reaming out the hole s in the multiple parts of the rear spar. Made sure I noted the holes not to rivet, and finished riveting the rear spar structure to the ribs. Also reviewing the plans I noticed missing a doubler plate for the top rib, for the Glide Slope / Localizer / VOR antenna puck. This is now complete.
Tuesday, January 3, 2017
Rudder structure begins
2.5 hours - While I wait for the new / replacement Rivnut tools...I started on the rudder assembly. Began by preparing the spar and ribs, spraying with primer, and then bringing the parts home to complete in my garage workshop (where I built the Sonex).
This is what the structure looks like riveted together. The tip rib is offset with the counterweight at the end.
This is what the structure looks like riveted together. The tip rib is offset with the counterweight at the end.
Vertical stabilizer - rivnuts
1 hour - Received a new nut puller (rivnut) tool for Christmas. After using it on 6 rivnuts the mandrel for the M3 inserts broke on me...not too happy about that. I ended up purchasing a better tool (the one Craig M. recommends) and in the meantime the vendor responded today they will send me a replacement M3 mandrel.
Needless to say I wasn't able to complete these parts and the vertical stabilizer structure.
Needless to say I wasn't able to complete these parts and the vertical stabilizer structure.
Saturday, December 17, 2016
Vertical Stabilizer - assembly begins
4 hrs. - This post combines about three separate days of activity spread over as many weeks, interrupted by my trip to LA when I got to fly the Sling 4.
First steps were unpacking the VS parts, then prepping and priming (did this before my trip). I then started to assemble the the spars and ribs...and riveted the front spar, nose ribs and main ribs 1-3 together.
I plan to build my Sling to IFR capabilities, so the tip rib of the VS gets a VOR/Localizer/Glide Slope antenna for navigation and landing aid.
The last picture is my helper...our German Shepard "Bear". He likes hanging out at the hangar!
Monday, November 28, 2016
Elevator Tips
1.5 hrs - this post is about completing the ends of the elevator- not about hints (tips) for building the elevator! The directions are fairly simple and clear for this step. Wrap the tip rib (with attached counterweight) with the forward elevator tip skin. Cleco and rivet. Then insert the fiberglass composite tip, position inside the aluminum skin, then drill and cleco the tip in place. Once it's fitted then clean up the holes as needed, insert the rivets and complete the assembly (pull the rivets). The fit was pretty good, looks like the trailing edge of each tip will need to be faired/filled to match the profile of the elevator aluminum skin better.
Saturday, November 26, 2016
Elevator Skin (Left side)
2.5 hrs. - Today Liam and I worked on the left elevator Skin, which is more complex than the right. Made sure we inserted all of the doublers for the rear channel that supports the trim tab. Everything fit together pretty well. The last items to do on the elevator is the outer forward skin and the composite tips.
Friday, November 25, 2016
Elevator Skin (right side)
2 hrs. - Removed the right skin fm the shipping crate, pealed off the inside film and cut away the rivet hole lines...and primed the inside. Carefully attached the skin to the right elevator structure and only had to open up a few holes on the top of the #1 ri to avoid the trailing edge deformation as shown in the plans. Once both sides were clecoed - I began riveting!
After finishing both sides - I then clecoed and riveted the leading edge where it wraps over the top and bottom skin. I had contemplated dimpling this rivet line and using CCC-42 (flush rivets)...but decided to just do as the plans call for. Once finished I trail fit the elevator to the horizontal Stabilizer...and it fits!
After finishing both sides - I then clecoed and riveted the leading edge where it wraps over the top and bottom skin. I had contemplated dimpling this rivet line and using CCC-42 (flush rivets)...but decided to just do as the plans call for. Once finished I trail fit the elevator to the horizontal Stabilizer...and it fits!
Thursday, November 24, 2016
Happy Thanksgiving! Elevator assembly continues...
2 hrs. Continued installing and riveting the ribs #2 and #3. Unfortunately I mixed up the location of the Left and Right sides since I was building this upside down (to allow for the elevator control horn to face up). Had to drill out about 12 of the larger alum. rivets...move the ribs to the opposite side, and re-rivet.
Moving on to the outer Ribs, now it gets a little more fun. Had to cleco and then updrill the counterweight to allow for the extra large 4.8mm rivet to fit. These are rivets on and I'm going to only do one side at a time for the outer rib, and skin since my work table is only 6' long. I'm finding the counterweight is torquing the last rib and entire elevator structure if it's not supported.
Moving on to the outer Ribs, now it gets a little more fun. Had to cleco and then updrill the counterweight to allow for the extra large 4.8mm rivet to fit. These are rivets on and I'm going to only do one side at a time for the outer rib, and skin since my work table is only 6' long. I'm finding the counterweight is torquing the last rib and entire elevator structure if it's not supported.
Friday, November 18, 2016
Elevator parts prep and begin riveting spar
3 hrs. - I've consolidated a few separate sessions into this post. Began by prepping the elevator spar, ribs, attach angles, doubler channels, etc. by removing the plastic film, and deburring edges and holes as needed. Primed all of the parts with self etching primer.
After the primer set it was onto following the steps in the book for item #1 and #2.
And a detailed picture of the elevator control horn and center hinge bracket with the inner ribs (rib 1 - left and right) now attached with rivets and the AN-bolts/nuts.
After the primer set it was onto following the steps in the book for item #1 and #2.
And a detailed picture of the elevator control horn and center hinge bracket with the inner ribs (rib 1 - left and right) now attached with rivets and the AN-bolts/nuts.
Subscribe to:
Posts (Atom)


